The backbone of a well-structured digital project answering the crucial questions about layouts, navigation, visual hierarchy, information architecture, and content priority from the start is a Wireframe. Wireframe is a basic visual guide used in a site’s interface design that sets its structure and maintains design consistency throughout your project.
Wireframes don’t have one definite type — they can be made in image editors, specialized wire framing tools, or even sketched on paper. Platforms like our own app UXPin facilitate interactive wireframes while also supporting hi-fi mockups, prototypes, and team collaboration. You may also opt for presentation software like Keynote or PowerPoint with nil installation cost.
Here’s a brief to help you understand the 5-Step Wire framing Process –
Content inventories are spreadsheets to list out all the content, as per distinct pages. Here’s a short process for making a good content inventory:
The inventory of content when allocated on a priority helps gain time for critical thinking on web designing elements and functionality.
Post content, visual hierarchy is essential. To simplify the wire framing process, label each item in your spreadsheet as primary, secondary, or tertiary elements in the spreadsheet.
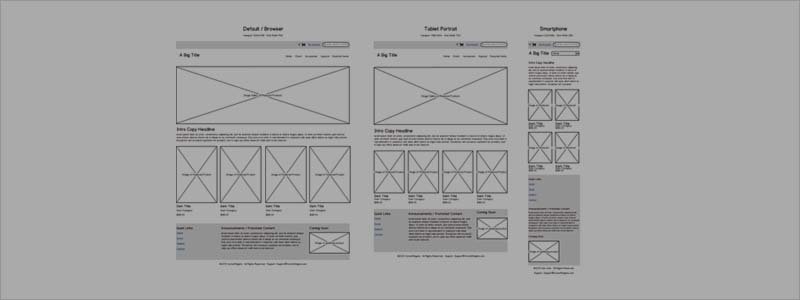
The content wireframes cares about the content blocks and the placement of the elements as per the smallest device screen first. Thereafter, one can add more elements as you scale upwards.
Once you have the overall layout solidified, you can start adding more details.
The next step is sculpting content blocks into recognizable pieces and designating where individual links and icons go. This will lead to set aside space for images, and start considering sizes. Wireframes are supposed to be “bland” yet with detailed using placeholders, boxes with Xs, and undefined buttons. Don’t miss out at user flows, as they help you optimize the placement of elements. At this stage you can start incorporating scanning patterns and more accurately defining your visual hierarchy.
A lo-fi prototype is where you can begin testing of the wireframe.
Even though it’s basic, slight interactivity on a lo-fi prototype can still help identify execution challenges, especially in broad categories like layout and navigation.
The rapid prototyping method involves creating prototypes as fast as possible, testing them, and then incorporating the feedback into the next build before starting the cycle over. This refines your design as you go, instead of testing everything all at once at the end.
A few quick tips before you are ready to implement the wire frame designed:
© 2024 Quintero Solutions - Digital Marketing Company with expertise in SEO, PPC and Website & App Design Development.


